Model Boat Hull Construction
The Carved Block Method - Part Two.
A step-by-step "how to" on ship model hull carving. Most commonly used for static display models, but easily adaptable for fiberglass masters or even toy boats.
We continue the model boat hull carving from part one where we prepared the block and cut out the profile.
Step 6: Shaping the hull sides
Now begin shaping the model boat hull. Start out by roughing in the bow and the stern. When roughing in, any tools you can think of are permitted: carving knife, draw knife, surform, spokeshave, hollow chisels, sand paper, files, rasps, 4-in-1’s, Dremel tool etc.
For bigger hulls an angle grinder with 40-60 grit flapper discs can work well. Regardless of tools, always cut from the middle of the hull towards the ends to avoid splitting.
There is only one rule here: DON’T TAKE OFF TOO MUCH!! As long as you are what the trade knows as “material safe” you’re fine.
Next, shape the bilge (the rounded part between the hull’s side and bottom). Start fitting the widest template, which usually is the one in the middle – although, doesn’t have to be.
Go easy as you are getting closer and stop when you are about a millimeter away from a perfect fit. This way there will be material left for a final polish.
Alternate carve/sand at the hull – check with the templates – go over the station lines with the pencil. At this point the pencil marks doesn’t have to be a nice thin line anymore – just eyeballing it is fine.
|
As you progress, move on to the next station towards the ends and do the same thing. With due effort, the hull will take shape nicely.
At this point you should be about 1mm away from having the templates fit. To check how true and fair the hull is lengthwise, take a thin strip of wood (a batten about 3mm [1/8"] square) and lay it along the waterline – sand down any high spots. 120 grit sandpaper should do it. Always back up the sandpaper with a block or dowel for better control and support.
Try with the batten at a few more imaginary lines parallel to the waterline and fix any high spots. Alternate sides, left and right and smooth out as you go.
Once the hull seems smooth, go over the stations once again with the pencil. Try and be a little neater this time.
Step 7: Shaping the Deck
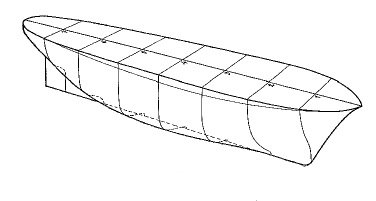
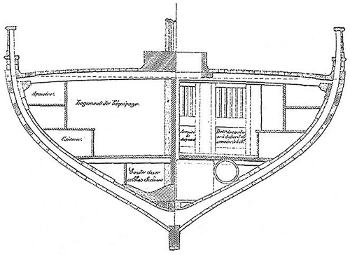
Let’s study the deck on a typical ship. These two illustrations are taken from the plans of a French cutter from the 19th century.

|
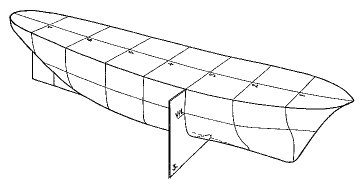
As seen on the profile, the deck line has a distinct concave curve to it as it spans from bow to stern.
|
In the cross section we notice there is convex curve to the deck, a crown, or camber as it is correctly termed. This saddle shape is still to this day the most common, regardless of ship type.
On large ships, the deck shape is much less pronounced. If you are building a large ship to a small scale you can ignore the camber. I haven’t checked, but I’m sure most plastic kits of all scales have excluded it, if that gives you an idea – besides, its your model so do what you want.
Now hold up each template to the hull at their respective stations and transfer a pencil mark where the deck line should be. If you intend to plank the deck with strips of wood, make sure you deduct the thickness of those planks so the finished deck has the right height.
|
Connect the deck line pencil marks with a solid line using a batten. You may need to connect a few at a time and work your way along the hull. At the end you should have a smooth line marking the line of the deck on either side.
Now it’s time to start shaping the deck. The best way I’ve found is to gradually cut down the corner above the deckline we just drew. The cuts are best made from the ends at shallow angles towards the center line of the hull.
Be careful to stay at least 1mm away from the deck line we drew up. This is a little bit of an art form, but I can’t think of a better way to describe it. Keep going until the crest of the camber at the widest station is about right.
Just like we did for truing up the model boat hull sides - use a batten along the center line and sand down any high spots. Do the same at a couple of places on each side of the center.
More Articles in This Series:
Return to Part One - preparing the wood block
Part Three - fitting keel, stem, sternpost and rudder
Part Four - planking the deck and fitting gunwales


