Drawing waterline on a tug boat model
by Sergio Barbalich
(Croazia)

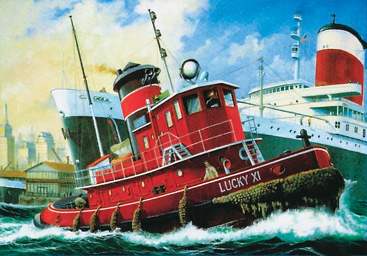
Revell Harbour Tug Boat box art.

Here is how I mark the waterline on model boats.
I am working on the Revell plastic model HARBOUR TUG BOAT of 23,1 cm (1:108 scale). My problem is how to draw most possible precise LWL (level water line).
Any suggestion would be most welcome.
That is a good question.
Many full-hull plastic kits have a faint ridge along the hull indicating the hull line. This makes it a lot easier.
The Revell Harbour Tug Boat is an old kit and predates this small but effective aid. So you're left to use one of many techniques that scratch builders have developed - probably a long time ago.
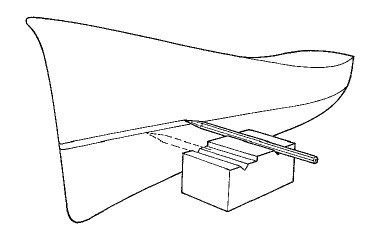
I'm sure there is more than one method, but the one I use is as shown in the illustration above.
All full-hull kits I've ever built come with a stand. Assemble the hull and let the glue set well.
With a sharp pencil, mark the position of the waterline at stem and stern.
Place the model in the stand and place the assembly on a flat surface. If the model slides around in the stand, use Silly Putty to hold it in place. I'm not sure what Silly Putty is called in Croatia, but it's the same putty/clay material teenagers hang poster directly on the walls with. The nice thing is that you can reposition the hull in the stand easily and remove it completely when you're done.
Attach a sharp pencil to a block (as in the illustration above). LEGO pieces are great for this. Either tape it down tight or super glue it. You don't want it to move.
Line up the hull and stand so that the marks you made at stem and stern are parallel with the table. The best way to do this is to use the pencil and block as a height gauge and compare the hull marks you made earlier. I'd shim the stand with thin scrap pieces of balsa or card stock. They can be super glued to the stand and later removed.
First shim it parallel to the table, then shim so that the pencil height match the hull marks. Shim either the hull or the pencil block as necessary.
Before marking the waterline, check the level from side to side. A good way to do this is to take a piece of heavy card stock cut with a square angle. With one end on the table top, line it up to one side of the hull. Make a pencil mark that lines up with the bump rail or top of the bulwark (or any other feature that makes for a good reference). You just created a simple height gauge.
Move the card height gauge to the opposite side and compare. Make sure you use a location that is symmetrical to the reference location.
Make careful adjustments. This is an iterative process (a lot of back-and-forth), so patience is a virtue.
Double check all locations, and draw the line with the pencil on the block sliding on the table. Hold the model firmly with the other hand without wiggling it out of position.
When done, mask and paint.
Best of luck with this and future model boats!
Petter


