Emily Clair, Part Two

by Gilbert Misson
(Tasmania, Australia)

Emily Claire

Emily Claire

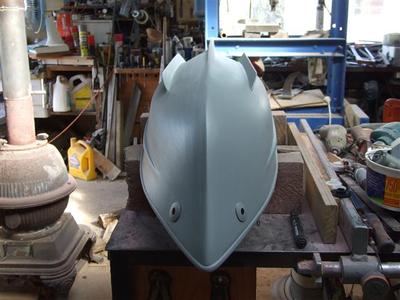
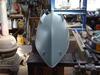
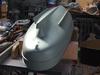
Hi Petter. I thought I should update you on the Emily Claire, she failed her first tank test. The hull was very unstable in the water and rolled around far to much. Even when I added ballast to the boat it was to unstable to go ahead with the building. So it was back to the drawing board to redesign the hull. I have made the hull 50mm deeper draft and straighter in the sides and stern ,and also added stabilizers to the hull. It sits nice in the water now and has taken the roll out of the hull. I will continue with the building and put up some more pictures when I have it ready to go in the water. I have added some more pictures of the redesigned hull.

Gilbert.

Comments for Emily Clair, Part Two

Average Rating starstarstarstarstar

Click here to add your own comments

Rating
starstarstarstarstar
Side Trawler Update
by: Gilbert Mission

Here is an update on the Emily Claire. I have had the boat in the water for for the sea trials and everything was going well till we lost all power in the middle of the lake.

We pulled a line across the lake to retrieve the boat. It turned out to be a problem with the ESC which would only operate in reverse.

Waiting for some more parts from Sydney New South Wales - they should be here soon and I will try again. I have put up some pictures of the boat almost ready to go in the water. I will put some more pictures when I put her the lake for another run.

Petter, you asked how I added buoyancy to the hull. This probably isn't the correct way to do it, but I turned the hull upside down and overlaid the original hull with Plaster-of-Paris to get the shape I wanted. I then laid the fibreglass up to the hull in two halves. I cut the hull of at the water line and fitted the new hull in two halves up to the boat. To finish I sanded the hull to a smooth finish.

Rating
starstarstarstarstar
A stellar job once again!
by: Petter

Gilbert, great work once again.

Adding buoyancy to a fiberglass hull is something I've never done. I would be curious to learn how you made the hull look so seamless and perfect. Looks fantastic!

Petter

Click here to add your own comments

Join in and write your own page! It's easy to do. How? Simply click here to return to Model Ship Gallery.

Share this page:
Enjoy this page? Please pay it forward. Here's how...

Would you prefer to share this page with others by linking to it?

  1. Click on the HTML link code below.
  2. Copy and paste it, adding a note of your own, into your blog, a Web page, forums, a blog comment, your Facebook account, or anywhere that someone would find this page valuable.
model boat plans store thumbnail image