Planking the RC Boat Hull
Want plans for this project? Get them at the Plan Store.
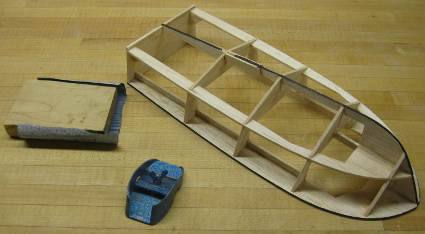
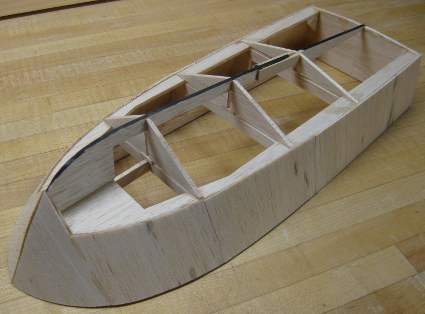
The RC boat hull is now almost ready for planking. The only thing standing in the way is some final sanding of the frame to take out any bumps and inconsistencies, and to provide more surface contact between the balsa planking and the hull structure.
Everybody hates sanding, I'm no exception. It is nonetheless an important step in completing a quality model hull. If done right it trues up a wobbly hull and add significant strength by better accommodating the hull planking.
The process isn't complicated, but may need a thorough break-down for the novice. This page is meant to clarify the sanding and planking process for the simple RC boat hull.
|
Prepping the hull
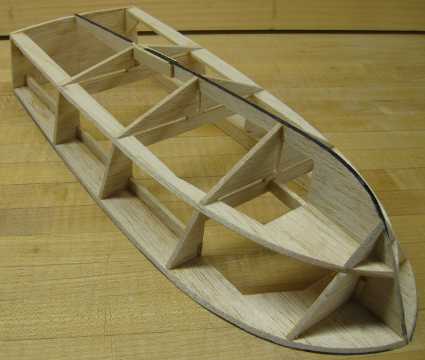
The first thing I do is to mark the edge of the deck and keel with a magic marker. It helps give me a visual indication of where I've sanded and helps give an early warning if I'm starting to take off too much material in one spot.
You may or may not want to mark the edge of the chine shelf as well. I did not on the prototype for some reason.
Tools
The only tools you need is some 80 to 100 grit sandpaper and a couple of sanding blocks. In the picture above you'll see a razor plane. I only used that to shape the lower part of the transom. I could just as well have used the sand paper.
You also need a good sanding block. The one on the picture is technically too wide, which made the sanding more difficult than it had to be. I'd recommend a hard block about 3/4" wide.
A narrow block that is swept along the hull with one of the long sides leading as its moved along the length of the hull will easier follow the changing contour. Another option here is to make a sanding stick - essentially the same thing, except the sandpaper is glued to the block/stick.
Sanding and Planking Procedure
When sanding there are two main things to pay attention to:
- The shape and fairness of the deck, keel and chine shelf
- The transition between bulkheads and deck and chine shelf (or stringers, if any)
Using the magic marker, as described before, is my best effort to take care of #1 above.
The illustration below shows the steps of sanding and planking in regards to #2 above. The red dots show where attention is needed for each step. A red line shows where a straight sanding block or stick has been used.
Don't take it as gospel, as some steps can be switched around without making much of a difference on the end result.
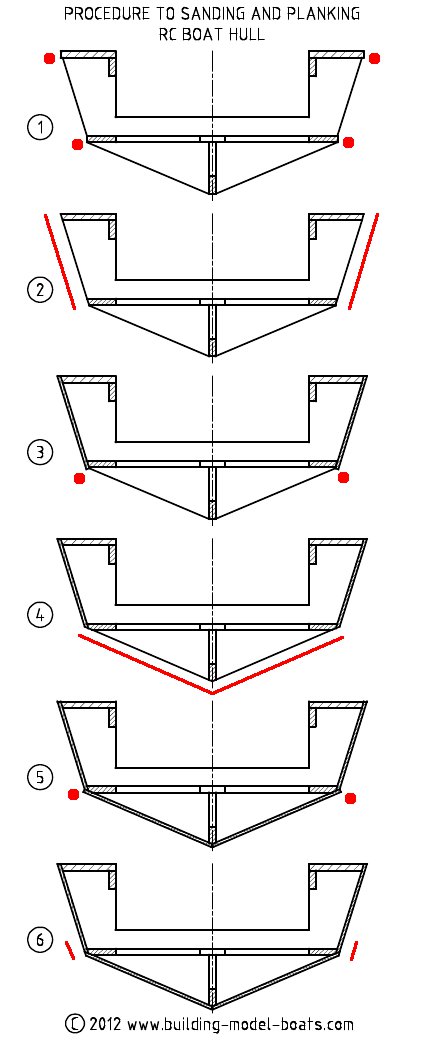
1 & 2: Sand Upper Panel
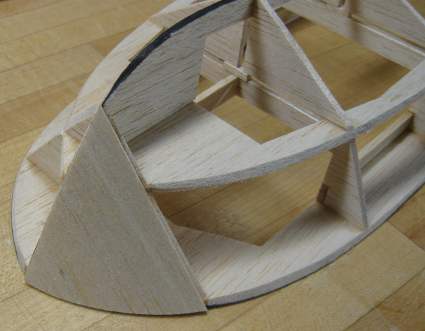
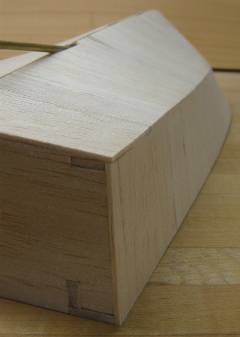
First the sharp edges at the underside of the deck and upper edge of the chine shelf needs to be sanded flush with the bulkheads. Continue sanding front to back so the sanded edges on the deck and chine shelf are true in that direction. At the stem, sand the keel to an edge. You can leave an ever so narrow flat at the extreme.
|
3: Plank the Upper Panel
Next step is to plank the upper panel. I tend to start at the stem and work my way to the stern. Generally the tighter bends and compound curves are more pronounced at the stem and I like to get them out of the way in the beginning.
|
Notice how I lay the first joint between balsa sheets in the middle of bulkhead #2. It will help hide the joint as there is less tension in the sheet from the steep bend. Also make sure you alternate sides when you plank: lay a sheet on the right, then the corresponding sheet on the left etc. It helps taking asymmetrical tension out of the hull as you progress.
|
I determine the shape of each sheet by holding a roughly cut piece of balsa to the hull with one hand and transferring the contour to the sheet with a pencil. Then I trim the sheet with a razor blade to the line. Most often it requires a couple iterations before I'm satisfied with the fit. Before I glue it in place with CA glue, I try it on the opposite side. If it fits well I make a copy of it for the other hand to save a little bit of time.
4: Sand Lower Panel
Sanding the lower panel is not that different from sanding the upper panel. It's easy to tear out parts of the balsa planking on the upper panel if you're not careful. You can lessen the risk of this happening by:
- avoiding the lightest quality balsa
- avoiding course sandpaper. Instead use a medium course sand paper: 80 to 120 grit
- When sanding, go in the direction along the length of the hull
Just as in step one, the keel needs to be sanded to an edge as well to give the planking some flat area to land on. Go easy and try and take material equally off both sides. A narrow flat in the middle is OK.
5: Planking the Lower Panel
Before planking the lower panel is a good opportunity to install the motor mount and propeller shaft. It is a lot more complicated doing after the hull is closed up.
The propeller shaft I made for this boat is identical to the one I made for this plastic kit conversion, only a little longer - measure on the plan for actual length. You can also use a commercial 2mm diameter prop shaft.

|
The planking is straight forward, just follow the same method as with the upper panels.
6: Sanding the Chine Transition
Last step is to sand the transition between the upper and lower panels. Generally the angle should be kept sharp at the rear 2/3 to 3/4 of the hull. Towards the stem the transition is more ambiguous and disappear completely at the first bulkhead.
|
Later we will finish the hull by adding a keel strip, rub and spray rail.


