RC PT 109 Project
Part Five
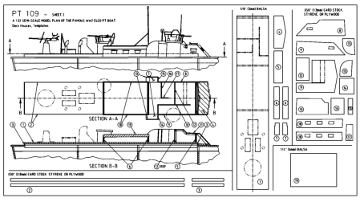
Want plans for this project? Get them here: Plan Store.
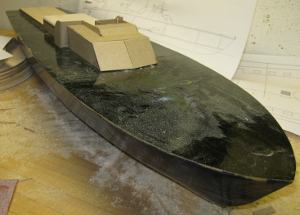
The RC PT 109 is getting its superstructure and deck houses built. The structure doubles as an access hatch for the RC gear.
PT 109 Deck Houses
|
The PT 109 has a couple of deck houses that I choose to combine into a conjoint superstructure. The reason is to provide an access hatch to be able to service the motor, battery and RC gear inside.
|
The beauty is that a coaming in the deck that both effectively keeps most water spray out and it helps locate and retain the access hatch.
Materials
For the construction I chose to use a combination of balsa and card stock. Both are inexpensive, easy to work with and light weight. They also glue well using CA glue. Some may think card stock is bad for a working model, but it'll be fine if properly sealed.
I considered using thin birch plywood or styrene sheet. However, I feel the plywood tend to have a bias (slight bow) that can be difficult to deal with. It is also heavier, more expensive and harder to cut.
I know some folks really like working with styrene. Its advantages include: glues well with CA glue, has a superb surface for painting, cuts easily with a regular hobby knife etc. It can be pricey though and I thought it would be heavier than card stock (I can't really confirm this though). Another concern is that Styrene doesn't age well. It tends to go brittle and start breaking easily over time.
The biggest downside with both balsa and card stock is that they require a lot of preparation before being painted. Essentially sealing and sanding in ad nauseam.
Tools
|
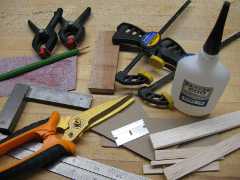
Tool and material preferences go hand-in-hand. The above picture shows the tools (and some materials) I used.
PT 109 deck houses construction
|
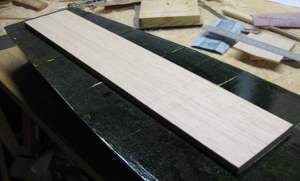
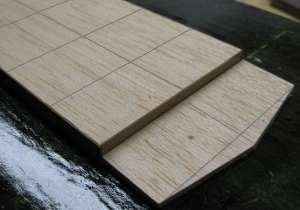
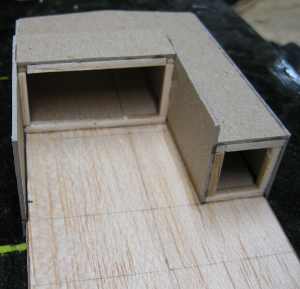
I started by cutting out a piece of 1/8-inch balsa, slightly larger than the coaming on the hull. The slight clearance is to permit paint and varnish to build up on both the coaming and the inside of the hatch. In this case I believe I left about 0.3-0.4 mm clearance all around.
Along the edge I glued strips of card stock around the edges to become the side walls that slip over the coaming.
At this point it is very helpful to use a machinist's square and mark the location of the different walls that make up the superstructure. This way a lot of confusion and general measuring will be reduced.
|
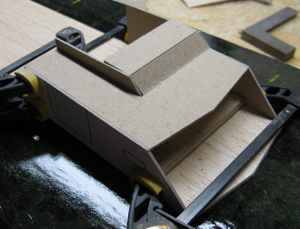
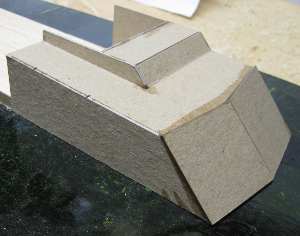
The front walls on the chart house (the foremost of the deck houses) are angled against the deck. When I created the coming it was set back further from the very front to provide room for a vertical coaming.
When building up the hatch I had to create an extended base for the front end of the chart house to attach to the hatch. I ended up cutting a piece of balsa that I attached to the front side of the rectangular hatch.
|
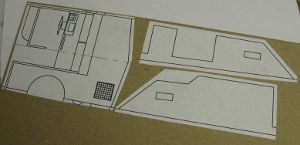
I drew up some templates and printed them out on regular copy paper. After roughly cutting them out, I attached them to the card stock using a temporary adhesive. Essentially turning the template into a sticker that later can be peeled off.

|
I've used a few different "temporary adhesives", such as 3M's famous "blue super 77". There are also less expensive knock-offs, by brands like Krylon that I found at Michael's Craft Store. If you prefer, I see no problem with permanently bonding the template to the material either. This just happened to be what I had available.

|
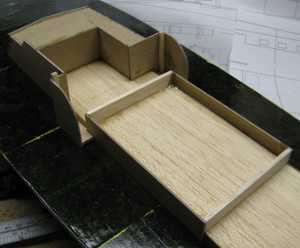
The card stock is thin, so to better support the joints I glued strips of balsa at most joints. Note also that the templates have been removed.
|
Through-out the process I frequently dry-fitted the parts. This helps reduce the scrap rate and prompt you to trim the edges if needed.
|
Once ready to commit, it is time to add some CA glue. This is one of the points-of-no-return. Mess up here and a lot of work will be wasted, or at least tricky to recover from.
|
It can be difficult to hold and place the small balsa strips sometimes. I used a T-pin and stabbed the balsa strip I needed to glue, applied the glue and held it in place holding only the pin. My fingers were *almost* always kept at a safe distance from the CA glue.
|
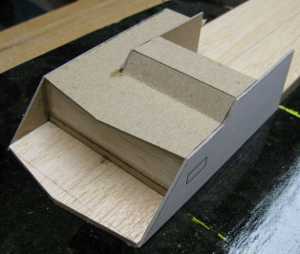
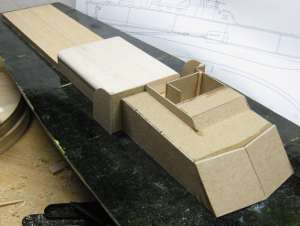
Note also that when scratch building, you don't have to cut out every little part from templates. Once the basic components are there, many of the subsequent parts can be shaped from those already in place. The front of the chart house of the PT 109 model is a perfect example.
|
One thing I agonized over was the construction of the spray shields for the entry to the bridge. In most sources they have a distinct bend in the turn, so to speak.
After a couple of attempts at bending card stock and much precious time wasted, I gave up on the idea and gave them a square corner. I'm thinking of sanding the outside corner before I paint. It'll be a much smaller radius than I've seen, but hopefully won't draw too much attention either.
|
Continue to Part Six: Building the PT 109 MG Turrets.
Recaps of the PT 109 build:
Part one: Start of the PT-109 build.
Part two: Cutting out parts and framing the hull.
Part three: Planking the hull.
Part four: Adding hatch coaming and deck.


