PT 109 MG Turrets
Want plans for this project? Get them at the Plan Store.
Building the PT 109 Machine Gun Turrets from scratch. This is part six in the series of building the 1:32 Semi Scale PT-109 for radio control.
The PT 109, and all 80-foot Elco PT boats for that matter, had two cylindrical turrets for two double-mounted .50 caliber machine guns. Their main purpose was to provide AA (Anti-Aircraft) defense.
The forward turret was intersecting the chart house (the forward deck house) on the starboard side, about even with the bridge. The rear turret was located on the port side, intersecting the stern wall of the day room (the rearmost deck house).
To scratch build these turrets in scale for the PT 109, I first had to secure a piece of appropriate tubing.
Find a tube of suitable size and material
Most pipes and tubes you'll come across are probably made of either metal, plastic or paper. Also consider any form of cylindrical packaging that may be of the right size. Here is what I'd look for and a few words of warning:
Plastic
PVC or ABS pipes can be readily found in home improvement stores. Because the wall typically is rather thick, I'd pass because weight is an issue. There are tubes available with thinner wall from specialized stores but the price goes up drastically. I think we can do better.
Also be careful with plastics such as Nylon, Polypropylene and Polethylene that are almost impossible to glue.
Metal
Copper, brass, steel and stainless steel - not appropriate, again due to weight. I would consider aluminum, however, the wall would have to be very thin which makes it difficult to work with without crushing it.
Paper
The best paper tubes are made from spiral-wound kraft paper. Some are made of lesser quality paper that tears a lot easier. Those may still be useful if they can be stabilized by saturating them with CA glue or low viscosity epoxy.
|
Paper tubes come in a all sizes and is often used in packaging of various household items and as shipping tubes. They can therefore easily be found for free or at minimal cost. You can also buy them commercially as rocket body tubes at very reasonable prices.
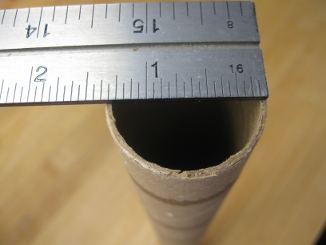
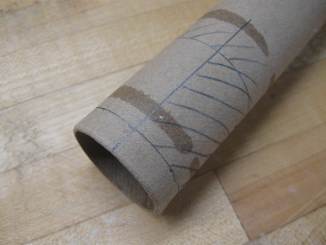
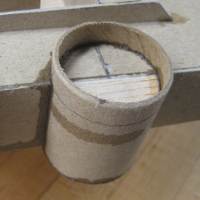
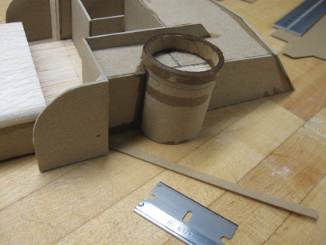
I'm not sure what the diameter of the turrets were on the originals. As I laid it out on the plans 1 3/8 inch, or about 35mm, outside diameter looked right at 1:32 scale. As I was scrounging for a suitable tube, I found the paper core for a GLAD pack food film at exactly that size.
The wall thickness is about 1/16" or 1.5mm. Be careful with thin walled tubes as they may not stay round. Roundness is also an issue with lesser quality paper, you know that pulpy stuff that feels like a TP core. If it feels firm as you press on it with your fingers it will most likely be OK.
If you're out of luck scrounging for a free roll, consider getting the rocket body tube for BT-55 or BT-56 engines for the 1:32 scale PT boat. The outside diameters are for both are just a hair under 1 3/8" (34mm).
For 1:24 it gets a little trickier. You should be looking for 1 7/8 OD (47mm), and frankly, I have not found a matching paper tube for that size. Since weight is much less critical at that scale, 1-1/2" schedule 40 PVC or ABS pipe should work out quite well at 1.9" (48mm) OD.
PT 109 Forward MG Turret
Once I had the material secured, I proceeded to the building. Here is what I did.
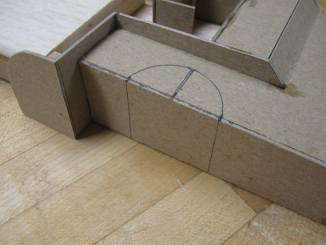
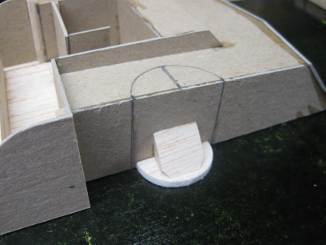
First I roughly marked the location on the chart room deck house with a pencil. Aim for having the outside wall intersect the center of the turret.
Location front-to-rear is less critical. Also note that the top of the turret is parallel to the roof of the chart house - but NOT parallel to the deck.
|
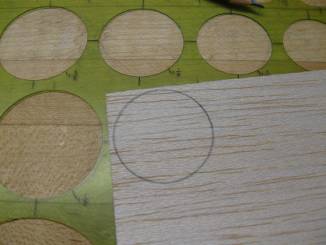
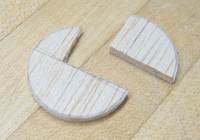
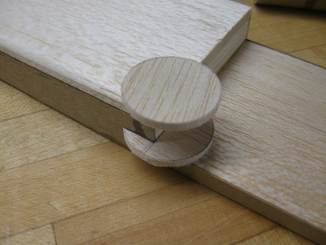
Next, make some round balsa disks to fit inside the tube. You'll need three total for this project (one for the forward turret and two for the rear). They don't need to be perfect, but a somewhat tight fit is desirable.
I used a circle drafting template to draw some circles on a 1/8" (3mm) balsa sheet. You'd be helped by marking the center of the circle before you use the template - something I forgot to do.
|
Once the circles are drawn, cut them out with a single-edged razor blade or an X-acto knife. Start by cutting a square fitted perfectly around the circle you drew.
Next trim each corner back tangential to the circle. If you did it right you should now have an almost perfect octagon. Give each of the eight corners the same treatment until you have a hexadecagon (a sixteen-sided polygon; I had to look that up).
Now it's easy to finish sanding until you have an almost perfect circle.
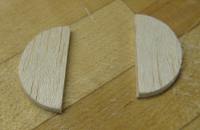
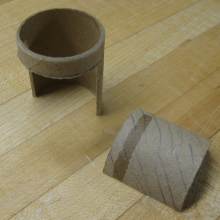
Hopefully, by the time you're done you have three balsa discs that have a sliding fit inside the tube. Put two aside for the rear turret while you slice the third piece in two, down the middle.
|
This is where it helps having marked the center before you cut out the discs as eye-balling (or even measuring) the center after the fact is tricky, to say the least.
|
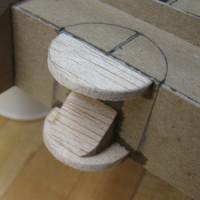
I then attach the lower disc to the PT 109 deck house assembly. This is best done by placing the assembly on the hull so the disc lies flat on the deck. Use a tiny amount of CA glue just to tack it in place. Too much can spell disaster.
I also added a scrap piece of balsa as a gusset for extra support. Any shape will do as long as the fit is acceptable. Once you're happy, remove the deck house assembly from the model and add more CA glue to the now half-disc, and the gusset.
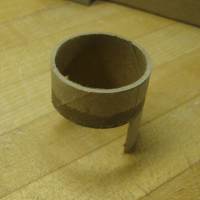
Time to cut the paper tube. The turret sits halfway over the edge of the chart house wall and is perpendicular to it's roof. Therefore the cut is a perfect stair-step, slitting the tube down the middle and cut perpendicular to it's center-line. Huh?
Mark like this:
|
And cut like this:
|
When marking/cutting - make sure the half-round section is left long so it extends passed the lower edge of the half disc.
The best tool for cutting this tube is by far an X-acto razor saw. I considered using my tabletop band-saw, but it would have been a challenge staying on center. The paper tube is mo natch for the razor saw and three cuts were done in less than two minutes. It leaves a neat cut and the kerf is only .010 wide. This saw is well worth the money.
|
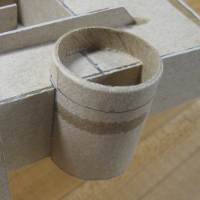
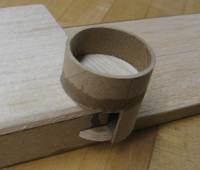
Next, dry-fit the turret tube over the chart house using the attached balsa half disc as a locator. It should fit nicely along the disc and both the side and roof of the chart house.
While dry-fitting I marked the right and left sides where the tube meets the wall of the chart house. This way I'll have a visual guide for attaching the upper balsa half disc.
|
Before committing with a dab of CA glue, I held the disc centered between the fresh marks, and held a straight-edge against the chart house roof and over the top of the half disc to make sure they were flush.
|
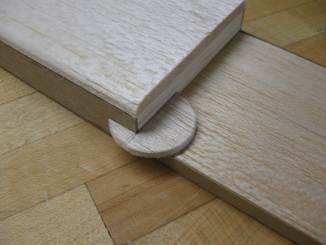
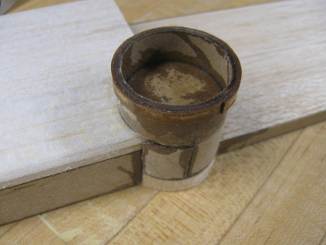
Time to attach the forward turret tube. Slip the tube over the two half discs and trim if necessary. Once it all looks good, flood all joints with CA glue. After the glue has set, the lower part of the tube can be trimmed back. The last bit is best sanded down against a piece of sandpaper on a flat table top.
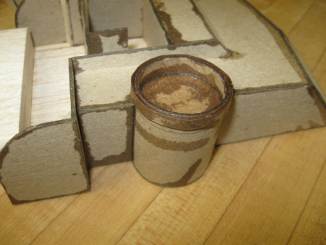
PT 109 Rear MG Turret
The rear turret of the PT 109 is a little more difficult to fit because the intersections between the turret and adjacent faces are more intricate. There is probably a better path than the one I took, but hindsight is 20/20, so of you read this and think there is a better way, by all means, it's your boat.
I decided early on that the lowest part of the turret was going to be filled in with a small balsa block. Fitting the tube snugly to two horizontal levels seemed too daunting.
I started by shaping the disc that locates the turret tube to the deck house assembly.
|
And glued it in place.
|
Cutting this turret tube to shape is a little trickier than the forward turret, because the roof of the day room cabin is not perpendicular to the turret center-line. The turret appears to be leaning forward by about 2 1/2 degrees. This turns into .050" (1.3mm) over the diameter of the tube, so it's not much.
|
The solution was to cut the tube at square angles first, but go material safe - i.e. leave enough material to be able to sneak up on the actual angle.
Said and done, after cutting it square and dry-fitting I saturated the edges to be trimmed with CA glue to make them hard and easier to sand. I then used a hard sanding block and 180 grit sandpaper to trim the tube to shape.
|
After I was happy with the shape and fit of the turret tube I proceeded to dry-fitting the upper balsa disc. I used the turret tube as a guide to align the upper to the lower disc. I then placed a small dab of CA glue on the underside.
|
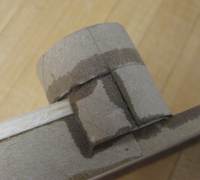
Next the turret tube itself was attached. A small scrap of tube was used to fill in the gap as seen in the next picture.
|
Finishing up the PT 109 MG Turrets
The upper rim of the turrets has a widening to them that needs to be accounted for. I cut some strips of .024" (0.6mm) thick kraft paper about 3/16"(5mm) wide and long enough to make two wraps around the turrets.
|
I then did the exact same on the rear turret. Had I thought if it, I probably should have attached the rim strip before attaching the tube to the deck house assembly.
Also note on the picture below, I attached a piece of balsa and trimmed it to shape to extend the rear turret to the deck.
|
The last thing was to add a paper floor to the turrets. My thinking was that a solid surface of the same material would be easier to finish later. It was simply traced out with the circle template and cut out with scissors.
|
Next will be filling, sanding, sealing and starting to add details to the PT 109 deck house assembly.
Recaps of the RC PT 109 build:
Part one: Start of the PT-109 build.
Part two: Cutting out parts and framing the hull
Part four: Adding hatch coaming and deck to the model
Part Five: Building the Deck Houses


